How to Plant Spring Bulbs in Autumn (Pots and Borders)
When and how to plant spring bulbs in autumn, with a month-by-month planting calendar and simple steps for borders, pots and lawns.
The garden is winding down, the evenings are drawing in, and this is exactly the moment to plant spring bulbs. A couple of hours with a trowel now gives you color from late winter right through to May.
Fortunately, bulbs are about as forgiving as gardening gets. Each one already holds the energy for next year’s flower. Your job is mostly to put it at the right depth, at the right time, in soil that doesn’t stay soggy.
This guide gives you a month-by-month planting calendar first, then the how-to for borders, pots and lawns.
When to plant spring bulbs: the calendar
Of course, timing depends on the bulb. Most spring bulbs want to go in while the soil still holds some warmth, so roots can form before winter. Tulips are the exception and prefer colder soil.
| Month | What to do | Bulbs to plant |
|---|---|---|
| August | Order bulbs and plan where they’ll go | None yet, but buy early for the best choice |
| September | Start planting the early risers | Daffodils, crocuses, ornamental onions, snowdrops (dry bulbs) |
| October | Main planting month for most bulbs | Hyacinths, grape hyacinths, remaining daffodils |
| November | Tulip time | Tulips, plus any bulbs you haven’t planted yet |
| December | Last chance if the ground isn’t frozen | Leftover tulips, planted in pots if borders are waterlogged |
| January to February | Check pots and protect from hard frost | None |
| March to May | Enjoy the display and deadhead | Snowdrops “in the green” after flowering |
| June | Let foliage die back, then tidy | None |
In colder US regions, the ground can freeze much earlier. A common rule of thumb there is to plant spring bulbs about six weeks before the ground freezes hard. In mild areas, you can keep planting into early winter.
Choosing good bulbs
Before you plant anything, check what you bought. A healthy bulb sets you up for success.
- Firm, not soft. Squeeze gently. It should feel like a fresh onion.
- No mold. A little dry, papery skin is fine. Gray fuzz or soft patches are not.
- Size matters. Bigger bulbs of the same variety usually produce bigger or more flowers.
- Plant soon. Bulbs dry out in the bag. If you can’t plant right away, keep them somewhere cool, dry and airy.
Daffodil and tulip bulbs are toxic to dogs and cats, so store them out of reach. Plant them where pets aren’t likely to dig.
Easy spring bulbs for beginners
If you’re new to this, start with bulbs that come back reliably and shrug off a bit of neglect:
- Daffodils. Tough, cheerful, and usually left alone by squirrels.
- Crocuses. Low and early, great for the front of a border or a lawn.
- Grape hyacinths. Small blue spikes that spread happily in sun.
- Ornamental onions. Purple globes on tall stems that bridge spring and early summer.
- Snowdrops. Ideal for shade under shrubs, and among the first flowers of the year.
Mixing two or three of these is a simple way to plant spring bulbs that flower in waves rather than all at once.
How to plant spring bulbs in borders
Borders are where most people start, so begin there. Here’s the method, step by step.
- Pick a sunny spot. Most spring bulbs flower best in full sun or light shade. Many do well under deciduous trees, which let light through before their leaves open.
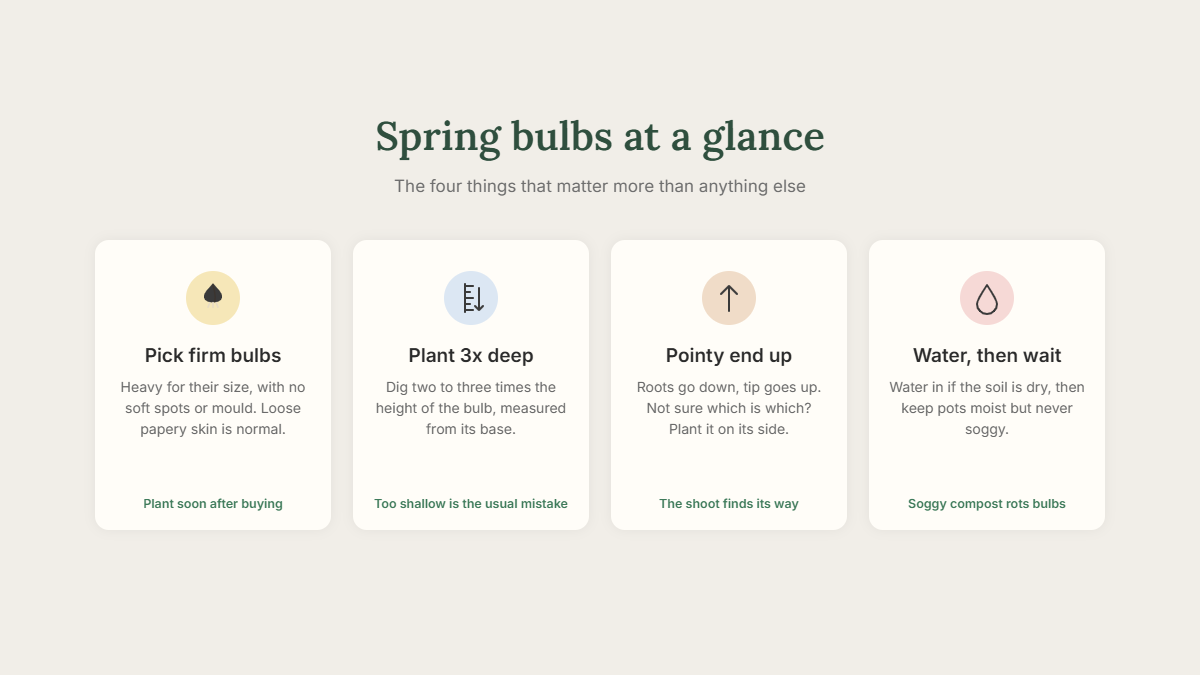
- Check drainage. Bulbs rot in soggy ground. On heavy clay, dig in some grit or plant on a thin layer of grit at the base of the hole.
- Dig to the right depth. As a general guide, plant bulbs at two to three times their own height. A 5cm daffodil bulb goes about 10 to 15cm deep.
- Point the right way up. The pointed end faces up, and the flatter end with roots faces down. Not sure which end is which? Lay it sideways and the shoot will find its own way up.
- Space them out. Leave roughly two bulb widths between each one. For a natural look, scatter a handful and plant where they land.
- Cover and firm. Refill the hole with soil, firm it gently, then water if the ground is dry.
For a fuller display, plant in groups of at least five to seven rather than single rows.
How to plant spring bulbs in pots
Pots are ideal for small gardens and balconies because they fit almost anywhere. They also let you move a display to the front door when it peaks.
The Royal Horticultural Society has a helpful guide on how to plant bulbs in a pot, and the basics are simple:
- Use a pot with drainage holes and a layer of crocks or grit at the bottom.
- Fill with peat-free multipurpose compost mixed with some grit.
- Plant bulbs closer than in borders, almost touching but not quite.
- Keep the same depth rule, or a little shallower if the pot is small.
Try a bulb lasagna
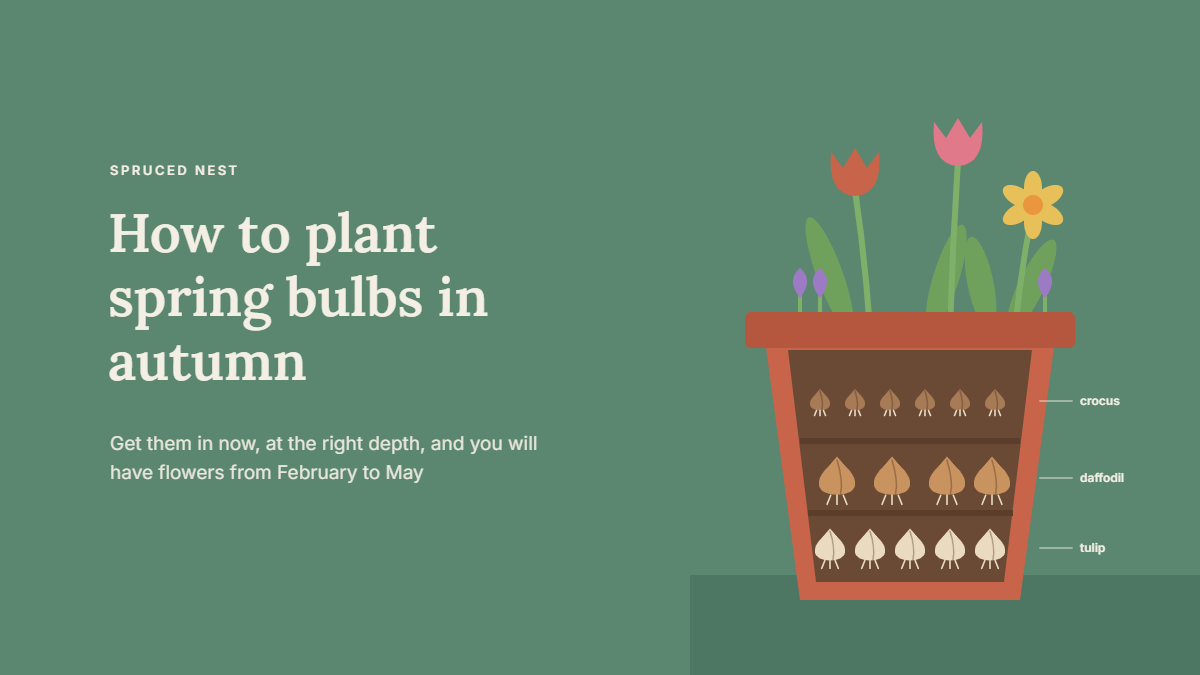
Layering bulbs, for example, gives a pot that flowers for weeks. Start with the biggest, latest-flowering bulbs, like tulips, in the deepest layer. Add compost, then a middle layer like daffodils. Finish with small, early bulbs near the top, such as crocuses or grape hyacinths.
Each layer grows up through the others. As a result, one pot can flower from February to May.
Planting bulbs in a lawn
Crocuses, snowdrops and small daffodils look great naturalized in grass. To plant them, lift a flap of turf with a spade, set the bulbs underneath, and press the turf back down. A bulb planter tool also works well for single bulbs.
However, you’ll need to delay mowing that patch until the foliage dies down in late spring.
Aftercare through winter and spring
Once you plant spring bulbs, there’s very little left to do. Still, a little attention pays off.
- Water pots if the compost dries out, especially in dry, windy spells. Our guide on how to water container plants explains how to tell when they need it.
- Protect pots from hard frost by moving them against a house wall or wrapping them. See our tips to protect potted plants from frost.
- Stop squirrels by laying chicken wire over freshly planted pots or patches, then removing it once shoots appear.
- Mulch borders with leaf mold or compost to protect the soil. Your fallen leaves can be put to good use here.
Later, after flowering, snap off the dead flower heads but leave the leaves. They feed the bulb for next year. Wait until the foliage turns yellow and floppy, usually about six weeks, before cutting it back.
Common mistakes to avoid
- Planting too shallow. Shallow bulbs often flower poorly and may flop.
- Wet soil. More bulbs fail from rot than from cold.
- Planting tulips too early. Waiting until November helps them avoid some fungal problems.
- Cutting foliage too soon. It weakens next year’s display.
- Forgetting where you planted. Push in a label or a short stick as a marker.
Frequently asked questions
Is it too late to plant spring bulbs in December?
Not always. If the ground isn’t frozen or waterlogged, you can still plant. Tulips cope well with late planting. Bulbs left in the bag will dry out anyway, so it’s better to get them in.
Which way up do bulbs go?
Pointed end up, roots down. If you really can’t tell, plant the bulb on its side.
Do I need to feed bulbs when planting?
Usually not, because reasonable garden soil has enough nutrients. In pots, a fresh multipurpose compost is enough for the first year. A general feed after flowering can help pot-grown bulbs build up for the next season.
Can I plant spring bulbs in pots and keep them for next year?
Yes. Let the foliage die back naturally, then either leave the bulbs in the pot or lift, dry and store them somewhere cool until autumn. Tulips often flower less well in their second year, so many gardeners replant them fresh.
Your next step
Pick one spot, or one pot, and start there. Check the calendar above for what to plant this month, buy firm bulbs, and get them in the ground at the right depth. Next spring, you’ll be glad you did.