How to Organize Under the Kitchen Sink (Around the Pipes)
See what cluttered under kitchen sink storage looks like next to an organized setup, then follow 7 steps to sort it safely around the pipes.
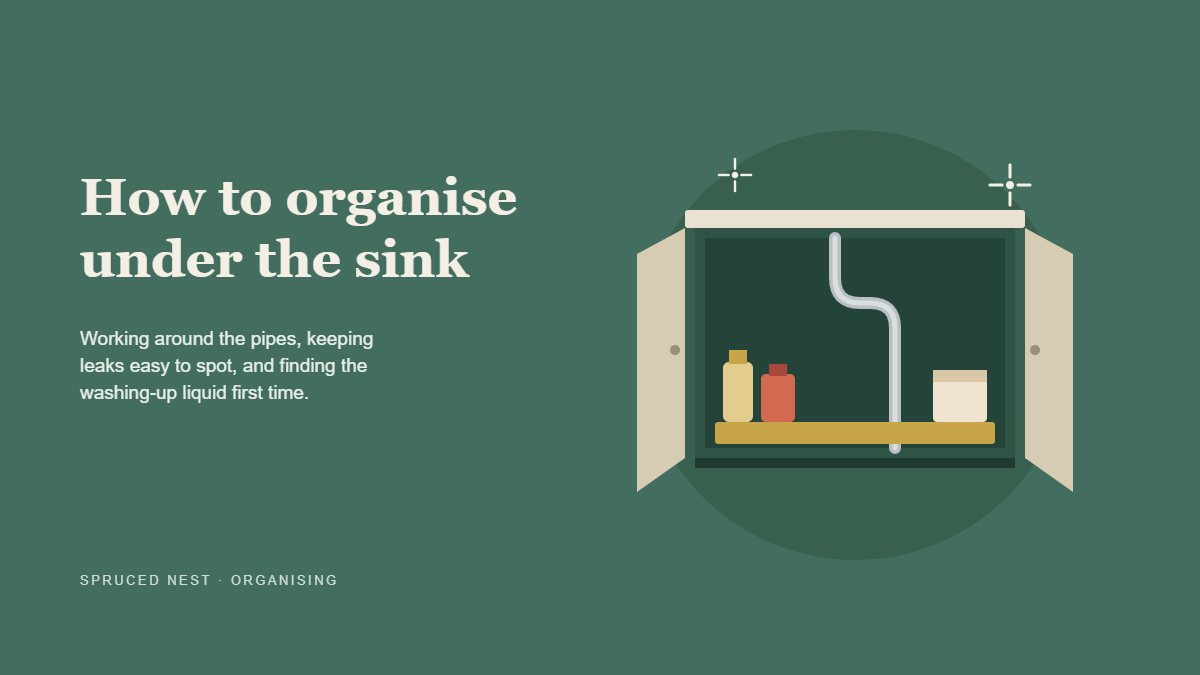
Open the cabinet and a bottle falls out. Sound familiar? Under kitchen sink storage is awkward by design, with pipes in the middle, a damp base and odd corners on both sides. Still, a few changes turn it into one of the most useful spots in the kitchen.
Picture a standard sink base, about 80 to 90cm wide, with a U-bend dropping down the center and two shutoff valves at the back. That’s the space this guide works with. Below, you’ll see what a cluttered setup usually looks like, what the fixed version looks like, and the exact steps to get from one to the other.
Before: a cluttered under kitchen sink cabinet
Most cabinets end up the same way. Nobody plans it. Instead, things just get pushed in over months.
- Half-used sprays and bottles stand in a crowd at the front.
- Spare sponges, cloths and bags are stuffed into gaps around the pipe.
- A box of dishwasher tablets sits in a damp patch at the back.
- The shutoff valves are buried behind everything.
- Nobody can see the base, so a slow drip goes unnoticed.
The result? You can never find the thing you need, and you buy duplicates. On top of that, a small leak can quietly soften the cabinet floor before anyone spots it.
After: what a well-organized cabinet looks like
By contrast, picture the same under kitchen sink space once it has been sorted.
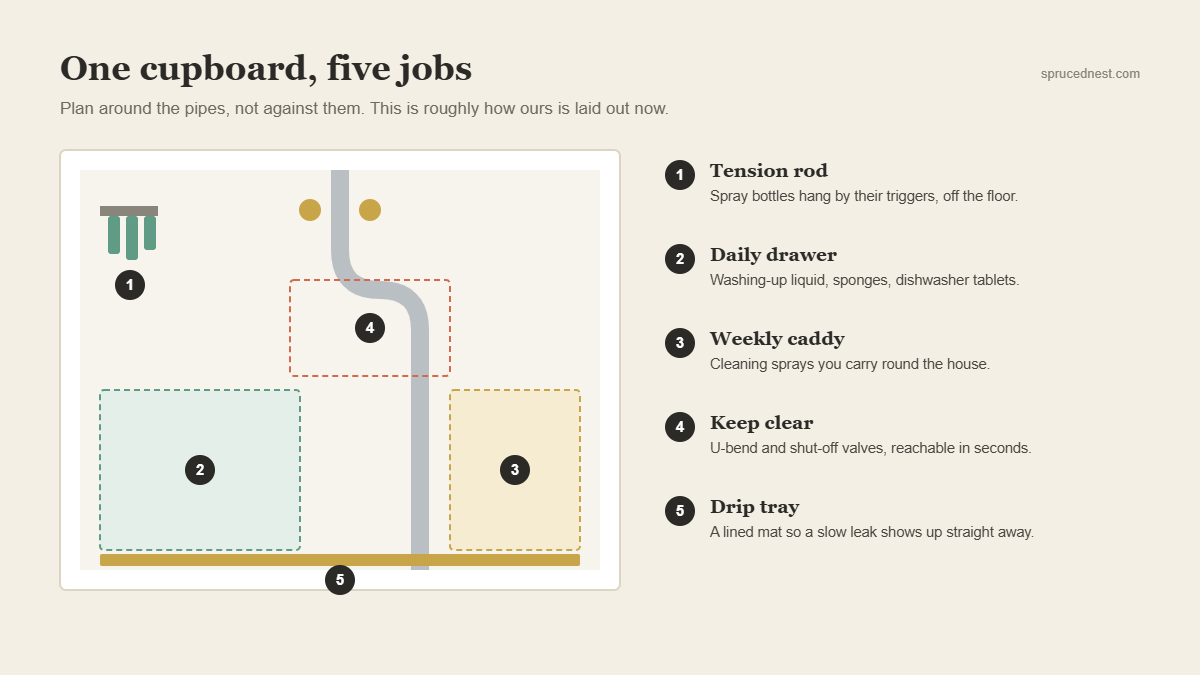
- The pipes and valves are clear, so you can reach them in seconds.
- A waterproof mat or tray lines the base.
- Daily items sit in a pull-out caddy at the front.
- Backup supplies live in one labeled bin behind it.
- The cabinet doors hold slim racks for sponges, gloves and bags.
Everything has a spot. As a result, you can see the floor, and a drip shows up right away.
Getting there doesn’t take expensive products, though. Most of the change comes from taking things out, not adding them. A mat, one caddy and a lidded bin cover the basics. Specialty organizers are optional extras for awkward spaces, and they work best once you know exactly what’s staying.
| Problem area | Before | After |
|---|---|---|
| Pipes and valves | Hidden behind bottles | Kept clear for access |
| Cabinet floor | Bare and often damp | Lined with a waterproof mat |
| Daily cleaners | Mixed in with backups | Grouped in one front caddy |
| Spare stock | Spread around the pipe | One bin, clearly labeled |
| Door space | Unused | Slim racks for small items |
How to organize under kitchen sink space, step by step
Step 1: Empty the cabinet completely
First, take everything out from under kitchen sink shelves and corners. Yes, everything. Put it on the counter or a towel on the floor so you can see what you actually own.
Next, use this moment to check for leaks. Run the tap for a minute, then feel the pipes and the base for drips. If water collects around the drain, read our guide on how to unblock a kitchen sink before you put anything back.
Step 2: Decide what belongs under the sink
Here’s a simple rule: if you don’t use it at the sink, it probably doesn’t need to live there. Dish soap, sponges, the dishwasher tablets and a general kitchen spray make sense. Paint, shoe polish and bulk paper towels usually don’t.
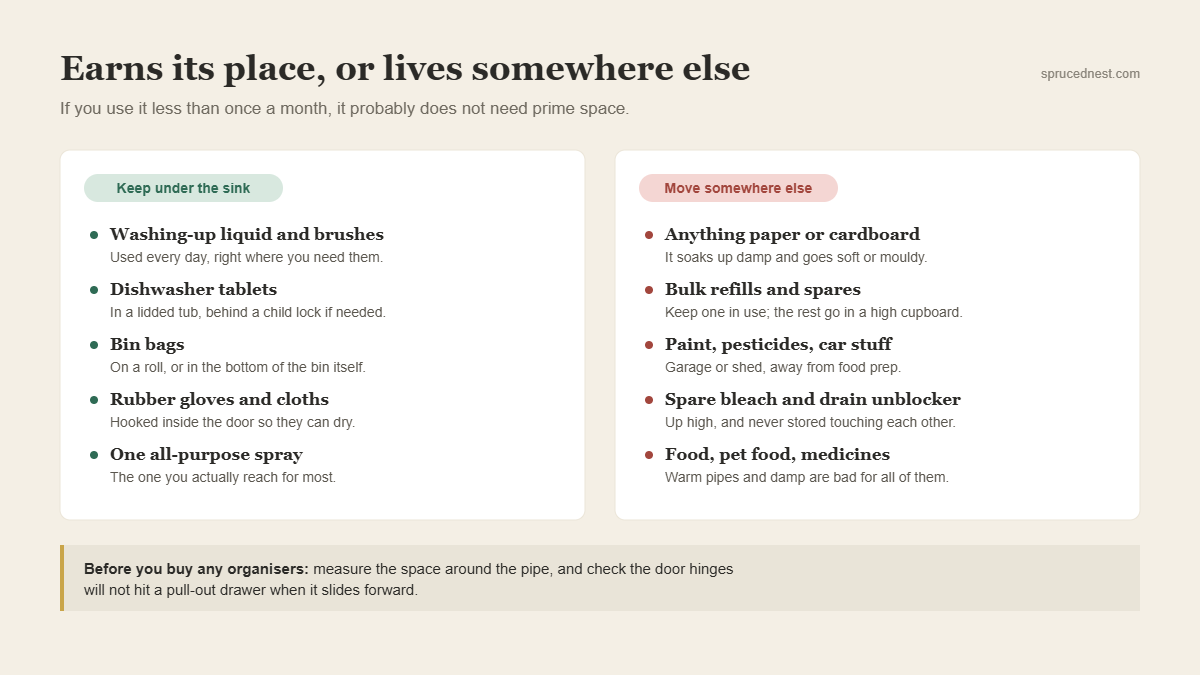
Usually worth keeping under the sink:
- Dish soap and dishwasher tablets
- Sponges, scrub brushes and rubber gloves
- One all-purpose kitchen spray
- Trash bags for the kitchen bin
- A small bucket or basin for soaking
Better stored somewhere else:
- Paint, glue and DIY supplies
- Bulk packs of paper towels
- Shoe polish and laundry products
- Pet food and treats
- Anything you use less than once a month
After that, throw away dried-out sponges and empty bottles. Also, combine duplicates where it’s safe to do so, but only if they’re the same product.
Step 3: Store cleaning products safely
Keep every product in its original container with the label intact. Never pour cleaners into old drink or food bottles.
Also, store bleach away from products that contain ammonia or acids, such as vinegar-based cleaners. Mixing them can release harmful gases, so you never want them leaking into each other.
If you have young children or pets, the space under kitchen sink cabinets is a high-risk spot. Fit a child-safety latch, or move strong chemicals to a high cupboard. KidsHealth has practical advice on preventing poisoning at home, and the ASPCA lists household products that can harm pets.
Step 4: Protect the cabinet floor
To begin with, line the base under kitchen sink pipes with a waterproof, washable mat. Silicone mats with a raised edge hold small leaks and protect particleboard from swelling. Alternatively, a shallow plastic tray works too, and it costs very little.
Step 5: Plan zones around the pipes
Above all, leave a clear zone around the U-bend and shutoff valves. You need to reach them fast in an emergency, and a plumber will thank you for it too.
Then use the spaces on either side:
- Front left or right: a caddy with a handle for daily cleaners.
- Back corners: a lidded bin for spare stock.
- Upper space: a tension rod across the cabinet to hang spray bottles by their triggers.
Step 6: Choose under kitchen sink organizers that fit
Measure first. For example, note the width, depth and height on each side of the pipe. Then pick organizers to match.
- Two-tier sliding drawers work in tall cabinets with room beside the pipe.
- Expandable shelves have adjustable legs that straddle the plumbing.
- Clear bins let you see stock levels at a glance.
- Door-mounted racks hold sponges, gloves and rolls of bags.
Finally, check that door racks won’t hit the pipe or the drawer runners when the door closes.
Step 7: Label and set a refill rule
Label the backup bin by its contents. After that, keep one rule: when you take the last spare from the bin, add it to your shopping list.
Adapting under kitchen sink storage to your setup
Not every sink base looks like the example above. Here’s how to adjust the plan.
Double sinks
Two bowls usually mean two drains and a more crowded center. For this reason, use narrow stacking bins on each side and lean heavily on the doors. A slim caddy that slides under kitchen sink pipes can hold sponges and brushes.
Sinks with a garbage disposal
A disposal unit hangs low and takes up much of the middle. Therefore, skip tall sliding drawers on that side. Keep the area around the unit and its power connection clear, and don’t stack anything on top of it.
Very small cabinets
In a narrow cabinet, the doors and a tension rod handle most of the storage. In other words, keep only daily items here. Move backup stock to a pantry shelf or a high cupboard.
Common mistakes to avoid
A few habits undo good under kitchen sink organizing quickly. Watch for these:
- Buying organizers before measuring. Pipes vary a lot, so an organizer that fits one cabinet may not fit yours.
- Storing food or pet food here. The space can be damp, and it often holds chemicals. Keep food elsewhere.
- Using cardboard boxes. That’s because they soak up water and attract pests. So plastic or metal is a better choice.
- Overbuying backups. Three spare bottles of the same spray take up room you could use better.
- Blocking the valves again. Once the space is clear, keep it that way.
Keep under kitchen sink storage working
A sorted cabinet stays sorted only if you check it now and then. For instance, every month or so, take a quick look at the base for damp, wipe the mat, and remove anything that has crept in.
If the rest of your kitchen needs the same treatment, our guide on how to organize kitchen cupboards uses a similar zone approach. And if the cabinet smells musty even when dry, check the dishwasher drain hose. Our tips for a dishwasher that isn’t cleaning properly include clearing the filter, which often helps.
Your next step is simple: tonight, empty the cabinet and check for leaks. The rest takes about 30 minutes once you can see what you’re working with.



2 comments