How to Get Black Mold Off Silicone Sealant (and When to Reseal)
Mold on silicone sealant grows below the surface, which is why sprays fail. Score your sealant, then either soak the stains out or reseal the joint properly.
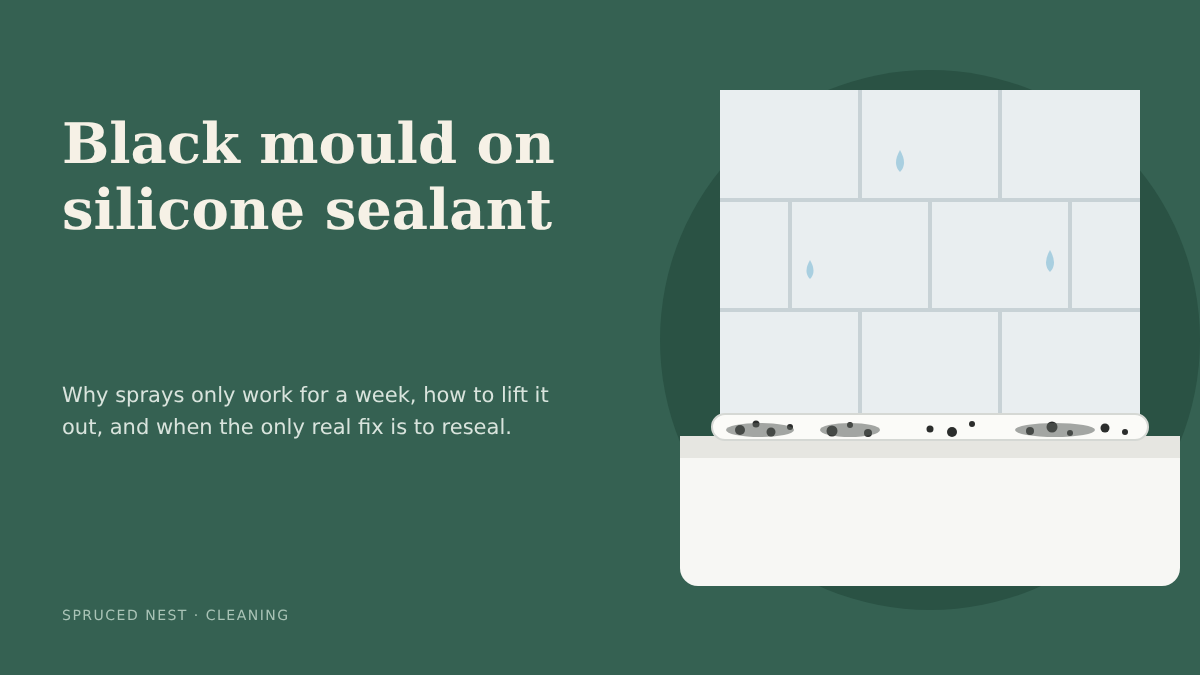
Is the mold on silicone sealant around your bathtub a cleaning job or a resealing job? Get that one decision right and you’ll save hours of wasted scrubbing. It only takes about two minutes.
Black spots on sealant are rarely just sitting on top. Silicone is soft and slightly porous, so mold threads grow down into it over time. Sprays reach the surface. They don’t reach the roots.
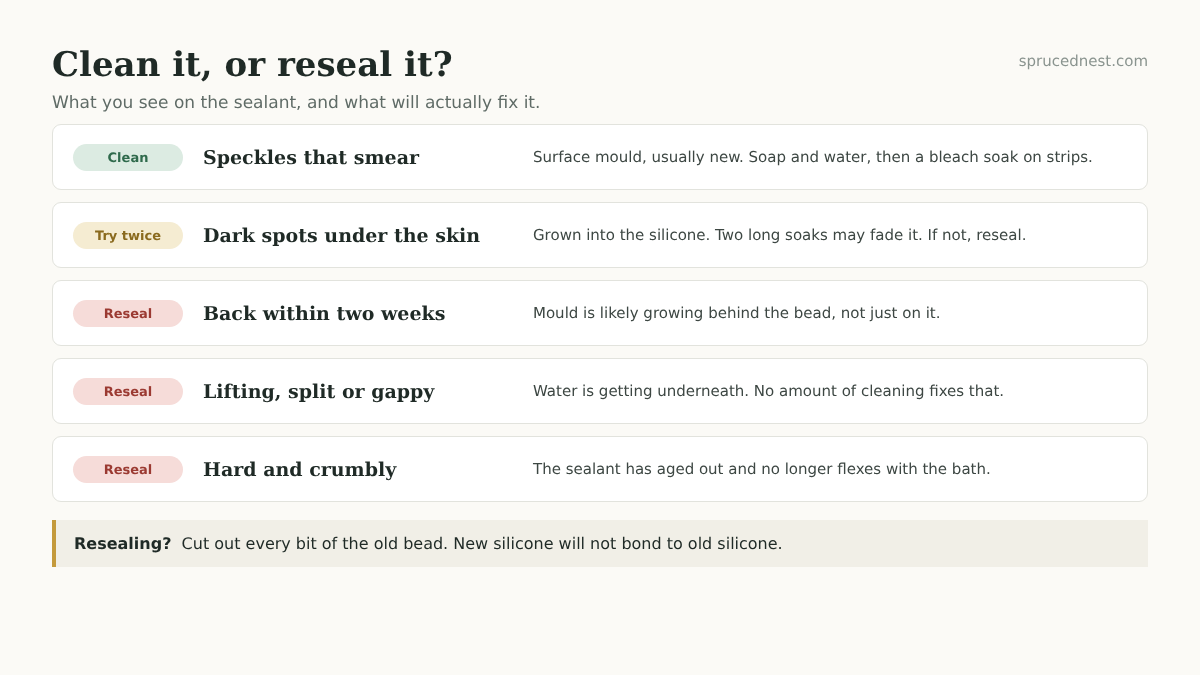
So before you buy another bottle of cleaner, score your silicone sealant with the table below. Then follow the method that matches your result.
Quick answer: If the spots smear on a cloth and the bead is still stuck down firmly, clean it with a thick bleach held on for several hours. If the sealant is lifting, cracked or crumbly, or the mold returns within two weeks, cut it out and reseal.
Step 1: Score your silicone sealant in two minutes
First, wash the bead with warm soapy water, rinse it, and towel it dry. Mold is much easier to judge on a clean, dry surface. Next, work down the scorecard and add up your points.
| Check | What you see | Points |
|---|---|---|
| Texture | Fuzzy or speckled spots that smear when wiped | 0 |
| Texture | Dark marks under a smooth, clear skin that nothing wipes off | 1 |
| Grip | Bead is stuck firmly to tile and tub along both edges | 0 |
| Grip | You can push a fingernail behind it, or it’s peeling | 3 |
| Condition | Soft and rubbery when pressed | 0 |
| Condition | Hard, cracked or crumbly | 3 |
| History | First outbreak, or months since the last clean | 0 |
| History | Spots return within two weeks of cleaning | 2 |
| History | Two long bleach soaks have already failed | 3 |
What your score means
- 0 points: Surface mold. Clean it with Method A and expect a good result.
- 1 or 2 points: Deep staining. Method A is worth one or two attempts, but the marks may only fade.
- 3 or more points: Failed sealant. Skip the cleaning and go straight to Method B.
Grip and condition carry the most weight for a simple reason. Once water gets behind the bead, mold grows on the back of the silicone where no cleaner can touch it. A spotless front won’t last long.
Why sprays don’t shift mold on silicone sealant
Most bathroom sprays are thin. On a vertical bead they run off in seconds, so they only ever touch the very top layer. They bleach what you can see, and the line looks better for a week. Then the mold underneath grows back out.
What a deep stain needs is contact time. A cleaner held against the silicone for hours soaks in far deeper than one that slides off in moments.
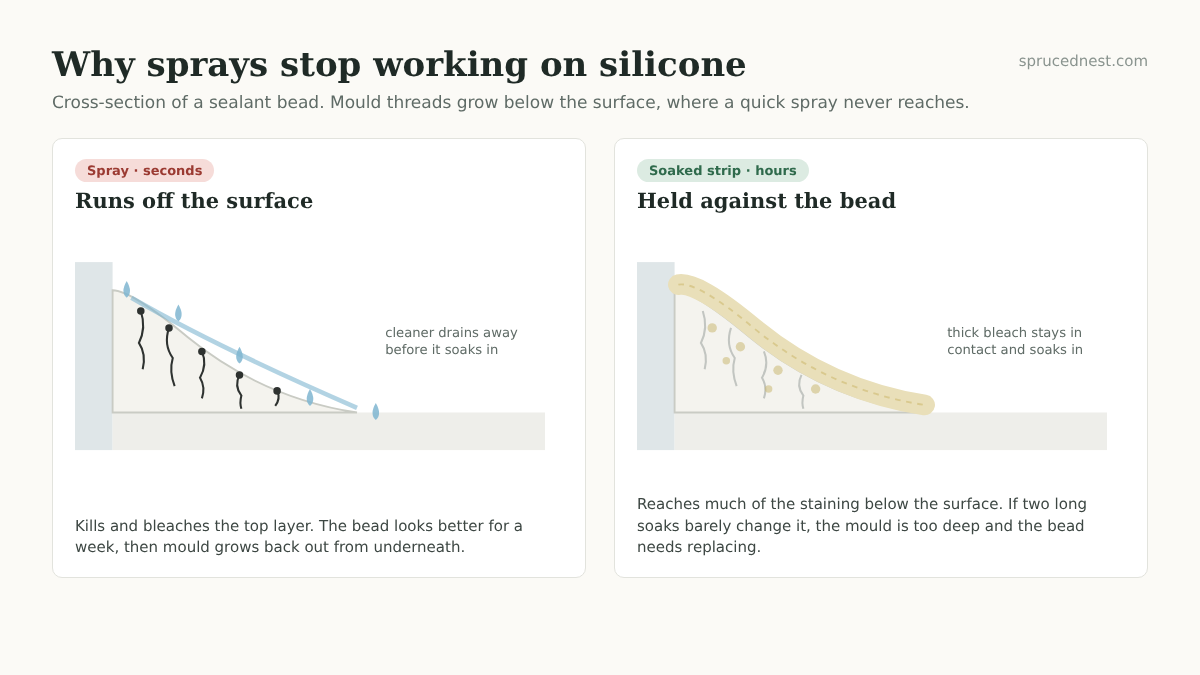
That simple idea is the whole basis of Method A.
Method A: Clean silicone sealant with a bleach soak
Safety first
Never mix bleach with vinegar, ammonia or any other cleaner. Bleach plus an acid releases chlorine gas, while bleach plus ammonia gives off toxic fumes. The EPA’s guide to mold and moisture warns against mixing bleach with ammonia products for the same reason.
Rinse off any product you’ve already used. Also open a window, wear rubber gloves, and keep kids and pets out of the room while the bleach works.
The soak method, step by step
- Clean and dry the bead. Soap scum and body oils sit on top of the mold and block the bleach. Wash with warm soapy water, rinse, and dry with a towel.
- Choose a thick bleach. A bleach gel or thick household bleach clings to the surface. Thin spray bleach runs straight off.
- Make soaking strips. Twist cotton pads or folded paper towels into thin ropes, then soak them in the bleach.
- Press the strips onto the sealant. Lay them along the bead so they stay in full contact. On a horizontal edge they’ll sit there on their own.
- Wait. Leave them for several hours, or overnight for older stains, with the room closed off and the window open.
- Rinse well. Remove the strips, rinse the bead thoroughly with clean water, and towel it dry.
- Repeat once if needed. If the spots have faded but not cleared, do one more round. After two long soaks, stop.
Three checks before you start
- Colored sealant: Bleach can lighten gray, almond or other colored silicone, so test a hidden section first.
- Natural stone: Keep bleach off marble and limestone, and mask them with tape.
- Fabrics: Move bath mats and towels away. A single drip leaves a pale mark.
Prefer not to use bleach? A bathroom mold remover works the same way, held on with soaked strips. Just follow the contact time on the label. Vinegar and baking soda are handy for hard water marks on shower doors and limescale on faucets and shower heads. However, they make little difference to deep mold on silicone sealant.
What a good result looks like
Surface mold usually clears in one treatment. Deeper staining, on the other hand, often fades to a faint gray shadow. If the bead is sound and the shadow doesn’t bother you, that’s a fine place to stop. If it does, or your score was 3 or higher, move on to Method B.
Method B: Replace silicone sealant when mold won’t budge
Resealing a bathtub or shower tray is a realistic afternoon job. You’ll need a tube of bathroom-grade silicone sealant, a caulking gun, a sealant removal tool or sharp blade, and masking tape. After that, it’s mostly patience while the new bead cures.
- Cut out all the old silicone. Run the tool or blade along both edges, then pull the bead away. New silicone won’t bond to old silicone, so leave none behind.
- Remove the residue. A silicone remover or plastic scraper lifts the thin film left on tile and tub.
- Treat the joint. Wipe the gap with diluted bleach or a mold remover, rinse, and let it dry completely. Overnight is ideal, because sealing over damp just traps the problem.
- Fill the bathtub with water. The extra weight opens the joint to its widest point. As a result, the new bead won’t tear the first time someone steps in. Skip this step for a shower tray.
- Mask both edges. Run tape along the tile and the tub, leaving a neat gap for the bead.
- Apply an even bead. Use silicone labeled for bathrooms with an added fungicide, then smooth it with a profiling tool or a wet finger.
- Peel the tape straight away. Pull it while the silicone is still wet for a crisp line.
- Let it cure. Follow the time on the tube, often 24 hours, before anyone showers. Drain the tub once the silicone has set.
Anti-mold sealant slows regrowth. Still, it doesn’t stop it alone, and in a damp bathroom it will eventually mark too. Keeping the bead dry is what really protects it.
Shortcuts that backfire
- Running new silicone over old. It looks fine for a few weeks, but the layers don’t bond. Water then creeps between them, and the mold grows back sealed in.
- Scrubbing hard with a stiff brush. This roughens the surface and gives future mold more grip.
- Spraying every few days. The bead looks better each time, yet the roots never get touched.
How to stop mold on silicone sealant coming back
The EPA’s advice boils down to this: control moisture and you control mold. In practice, a bead that dries within half an hour of a shower gives spores very little to work with. These habits make the biggest difference.
| Do this | Instead of this |
|---|---|
| Squeegee or towel-dry the bottom bead after showers | Leaving water pooled along the edge |
| Run the exhaust fan during and for 15 to 20 minutes after a shower | Shutting the door on a steamy room |
| Wipe the sealant with mild cleaner once a week | Waiting until black dots appear |
| Spread the shower curtain out to dry | Bunching a wet curtain against the tub |
| Keep bottles on a shelf or in a basket | Standing them on the sealant line |
The same rule applies elsewhere in the house. For example, a washing machine that smells usually has a damp door seal left shut, and the fix is identical: let it dry out.
Frequently asked questions
Is black mold on silicone dangerous?
A few spots on a sealant line are a common household problem, not an emergency. Even so, mold can irritate the airways, so people with asthma, allergies or weakened immune systems should take extra care. Deal with it promptly. If mold is spreading across walls or ceilings, that points to a damp problem worth having checked.
Can you paint over moldy silicone?
No. Paint doesn’t stick to silicone and will peel away, while the mold stays underneath. Clean it or replace it instead.
How often should silicone sealant be replaced?
There’s no fixed schedule. Replace it when it’s lifting, cracked or permanently stained. In a well-ventilated bathroom that’s cleaned regularly, a good bead can last for years.
Why does mold grow on the bottom edge first?
Water runs down and collects there, and it’s the last part of the bead to dry. A quick wipe along that edge after every shower makes a noticeable difference.
Your next step
Grab a cloth, clean one section of silicone sealant, and run the scorecard. Zero points means tonight’s job is a bleach soak. Three or more means it’s time for a fresh tube of silicone and a free afternoon.